6.5. Handling Web Map Service data
Cesium supports adding additional imagery layer to the Earth map by using the OGC compliant Web Map Service (WMS). The 3D web client provides a simple widget panel which allows the user to easily add and remove arbitrary number of WMS layers. The widget panel [1] (marked in the following figure) can be expanded and collapsed by clicking on the Add WMS-Layer button on the widget panel.
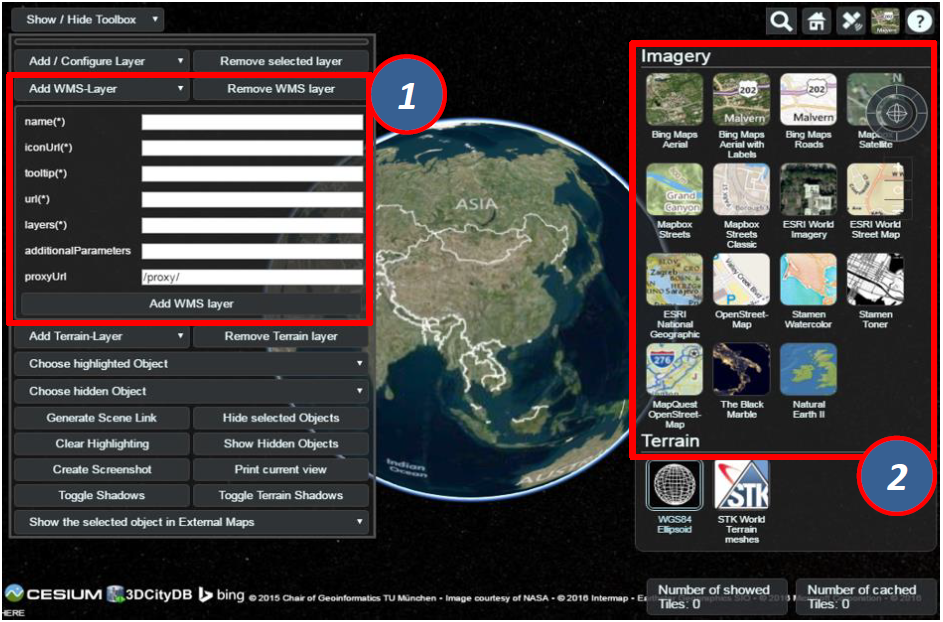
Fig. 6.13 The input panel [1] for adding a new WMS layer and the
BaseLayerPicker widget [2] where the added WMS layers will be listed
together with the per default available imagery layers
A user-defined name for labelling the WMS layer has to be firstly specified via the name()* input field. In addition, the iconUrl parameter points to the URL address of an icon image, which will be listed together with the user-defined layer name in the BaseLayerPicker panel [2]. When the mouse pointer is over the icon image, a tooltip will appear which can be specified in the tooltip()* input field. The url parameter value corresponds to the URL address of the WMS server that provides the imagery contents of a WMS layer. According to the WMS specification, a WMS layer is allowed to contain one or more sublayers (listed in the WMS Capabilities file) whose names must be separated by comma and entered into the input field layers()*. Besides the standard WMS HTTP request parameters, additional parameters might be required by some WMS servers. In this case, such additional parameters must be formatted as key=value pairs separated by the “&” character and entered into the additionalParameters input field. The proxyUrl parameter helps the 3D web client to get around the cross-domain issue when performing WMS requests. Since most of the WMS server do not support CORS, a proxy running behind the 3D web client is required. If you use the JavaScript-based HTTP server shipped with the 3D web client, you don’t need to change the default value, since there already exists a built-in proxy running with the relative path “/proxy/”. Otherwise, this parameter value must be adjusted according to the path of the proxy in use.
Usage example:
In this example, a WMS imagery layer provided by the Vorarlberg State Government will be added to and displayed in the 3D web client. The following parameter values should be entered into the corresponding input fields:
- name: Vorarlberg_Aerial_Photography
- iconUrl: http://cdn.flaggenplatz.de/media/catalog/product/all/4489b.gif
- tootip: Vorarlberg Aerial Photography taken during the winter 2015
- url: http://vogis.cnv.at/mapserver/mapserv
- layers: wi2015_20cm
- additionalParameters: map=i_luftbilder_r_wms.map
- proxyUrl: /proxy/
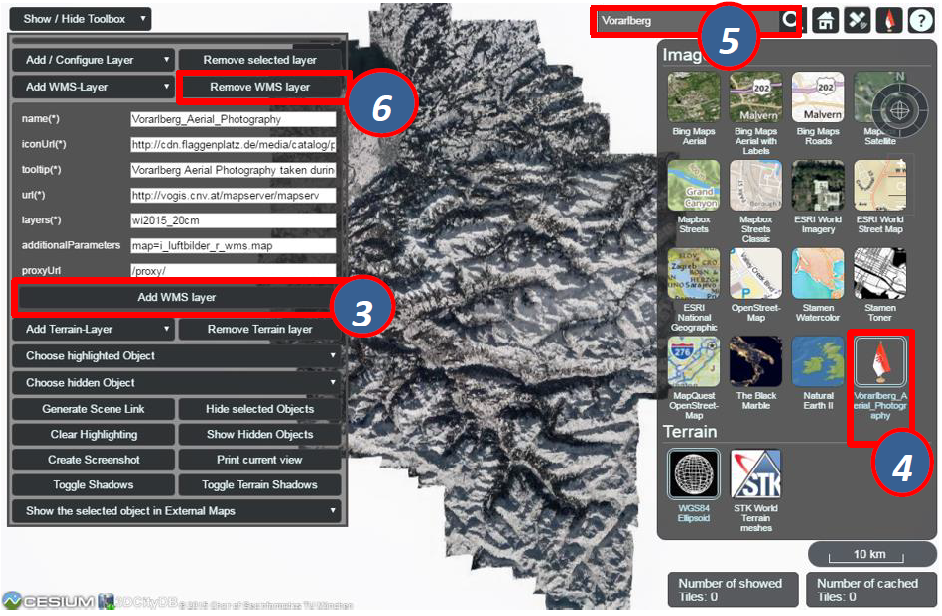
Fig. 6.14 Example showing how to add a new WMS layer to the 3D web client
As shown in the figure above, once the parameter settings have been completed, the WMS layer can be loaded by clicking on the Add WMS layer button [3] and its icon image together with its label name [4] will be listed on the BaseLayerPicker widget. You can use the Geocoder widget [5] to zoom the Earth map to the region of Vorarlberg state and check the added WMS layer. Clicking on the Remove WMS layer button [6], the WMS layer will be removed and substituted with the Bing Maps Aerial that is the first item listed on the BaseLayerPicker widget.