5.3.6. Using an ADE with the Importer/Exporter
As mentioned in the previous sections, the ADE Manager plugin automatically transforms the XML Schema definition of a CityGML ADE to a compact relational database schema that seamlessly integrates with the 3DCityDB schema. And you can use the plugin to automatically deploy the created ADE schema in your 3DCityDB and use it for storing and managing ADE datasets with your own tools.
However, the Importer/Exporter tool cannot automatically process CityGML ADE data in a generic way. It offers a simple Java ADE API though that allows developers to implement a so-called ADE extension as Java library that will be automatically loaded by the Importer/Exporter when starting the tool. If the Importer/Exporter comes across ADE data in import or export operations, it will check whether an extension is available for this ADE. If so, the work will be delegated to this extension through corresponding method calls of the ADE API. Otherwise, the ADE data will be ignored. The ADE API of the Importer/Exporter therefore gives developers full control over how ADE data should be be managed in the ADE database schema created with the ADE Manager plugin.
Note
The ADE Manager plugin does not automatically create an ADE extension library for the Importer/Exporter. You have to manually develop this library for the ADE you want to use or download an existing ADE extension package if available. The open source Test ADE serves as example for how to implement an ADE extension against the ADE API of the Importer/Exporter. The TestADE is an artificial CityGML ADE for testing and demonstrating the ADE support of the 3D City Database.
The following brief guide explains the required steps for using the Test ADE with the Importer/Exporter.
Download the latest version of the Test ADE as ZIP package from the releases section of the GitHub repository at https://github.com/3dcitydb/extension-test-ade. This ZIP package contains the Java extension library for the Importer/Exporter as well as the ADE database schema and schema mapping file for the 3DCityDB.
Open the
ade-extensionsfolder within the installation directory of your Importer/Exporter and unzip the ZIP file of the Test ADE there. If theade-extensionsfolder does not exist, then create it first. After unzipping, a new subfolderextension-test-ade-{version}should have been created. Of course, you can freely choose another name for the folder.Check that the unzipped folder contains all files required by the Test ADE extension, namely the three subfolders
3dcitydb,schema-mappingandlib. Whereas the3dcitydbandschema-mappingfolders contain the files to register the ADE with the 3DCityDB (see Section 5.3.4), thelibfolder contains the JAR files that implement the ADE API of the Importer/Exporter. The folder structure should look like below.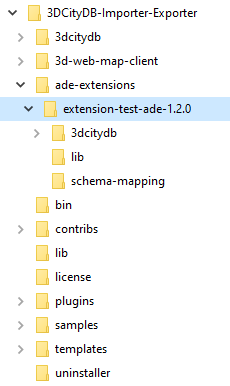
Launch the Importer/Exporter. The JAR files in the
libfolder along with the schema mapping file in theschema-mappingfolder will be automatically loaded by the Importer/Exporter.Create a new 3DCityDB instance to be used in the following steps. The database should be set up with the SRID 31468 as coordinate reference system. If you need assistance in setting up a 3DCityDB, check the guide provided in Section 1.3. The test database is called TestADE in the following.
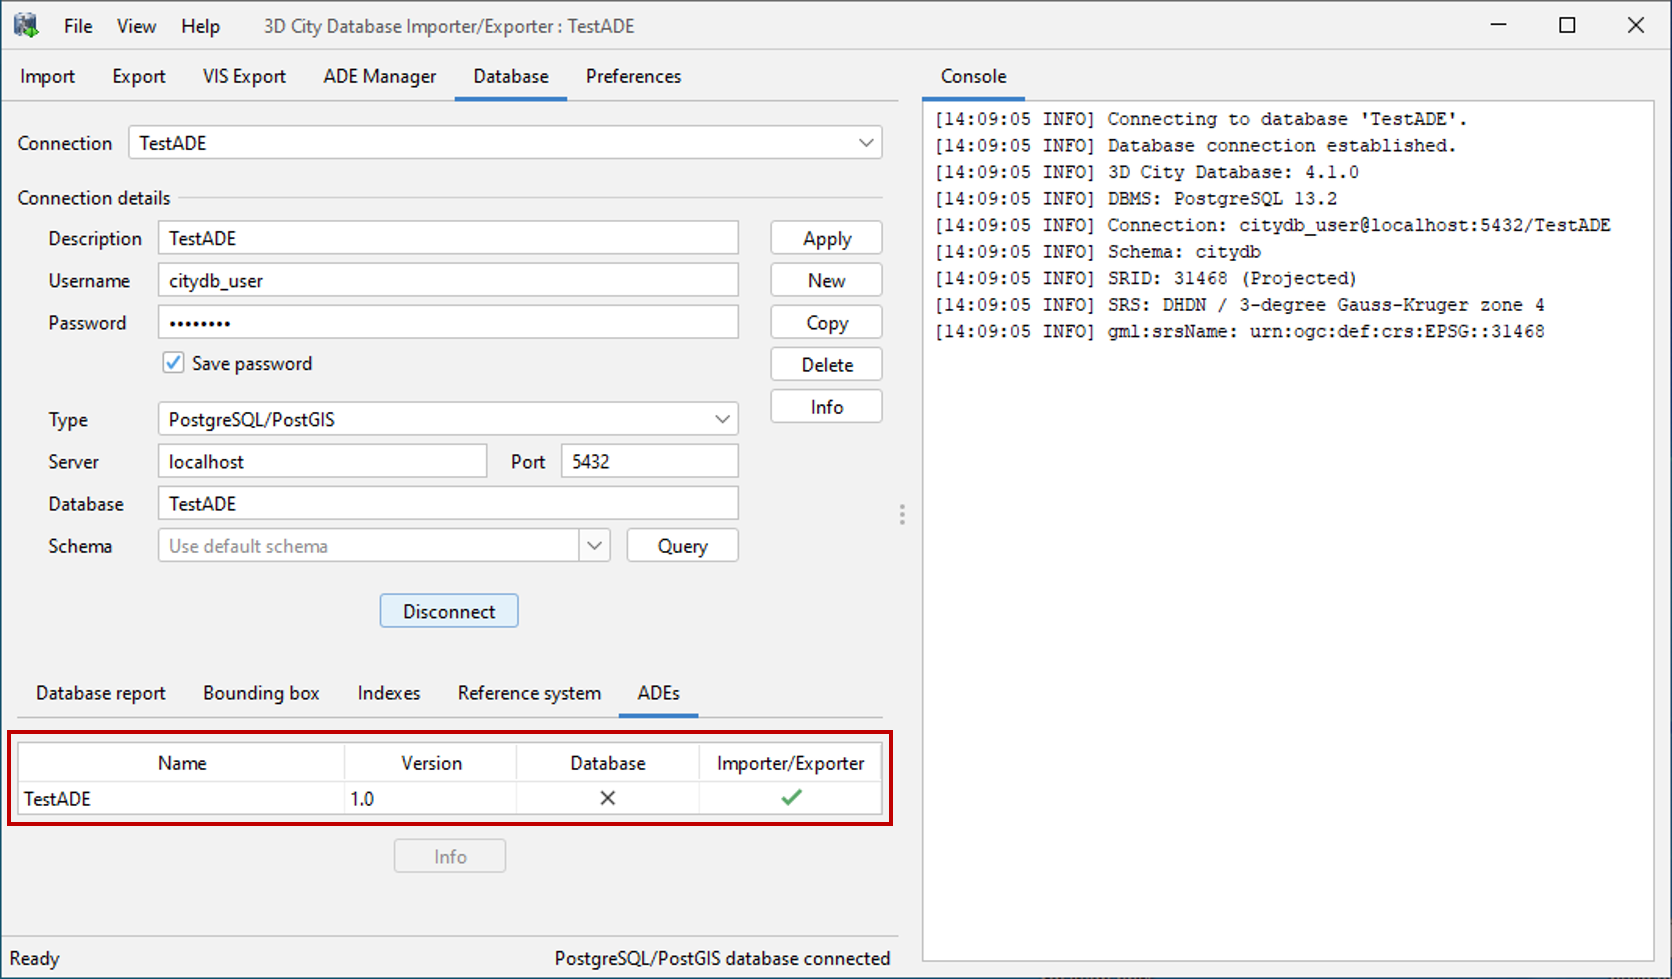
Connect to your new and empty 3DCityDB instance with the Importer/Exporter. Go to the Database tab and check that the Test ADE extension has been successfully loaded. The result should look similar to the screenshot below. The check sign in the Importer/Exporter column of the ADE table indicates that the Importer/Exporter now supports the Test ADE, while the cross sign in the Database column means the the Test ADE has not been registered with the 3DCityDB yet.
Go to the ADE Manager tab and register the Test ADE using the ADE registration operation described in Section 5.3.4. Use the
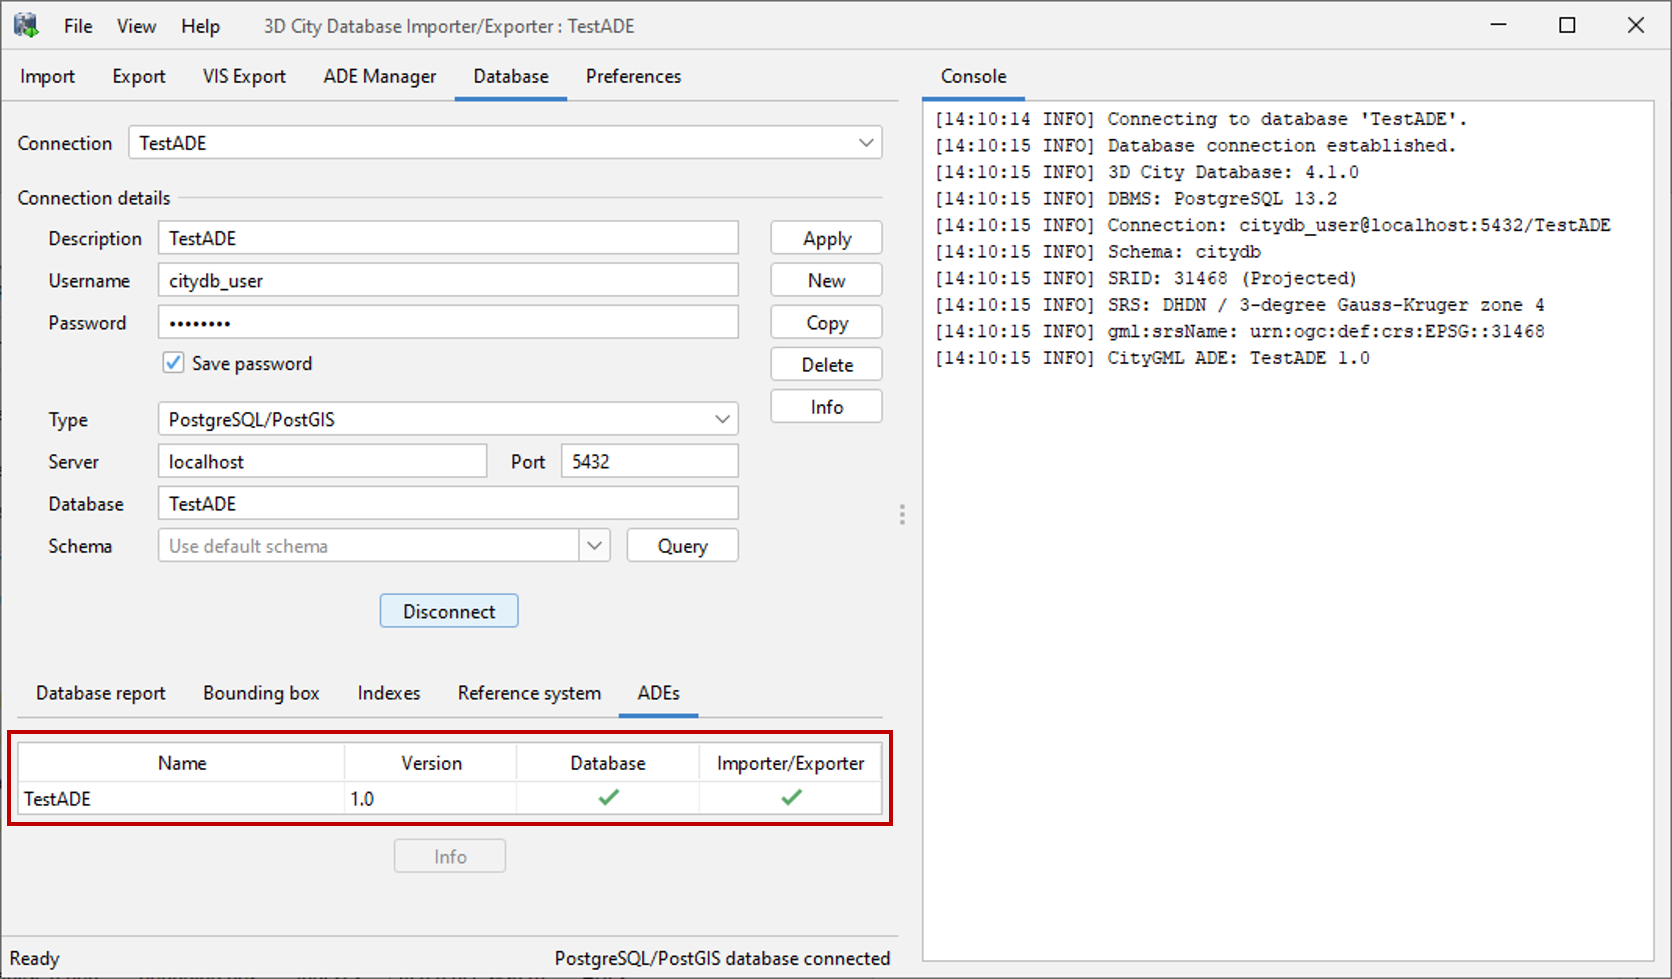
extension-test-ade-{version}folder of step 2 as input for the registration operation.Reconnect the TestADE database. The ADE table on the Database tab should now show check signs for both the database and the Importer/Exporter as illustrated below.
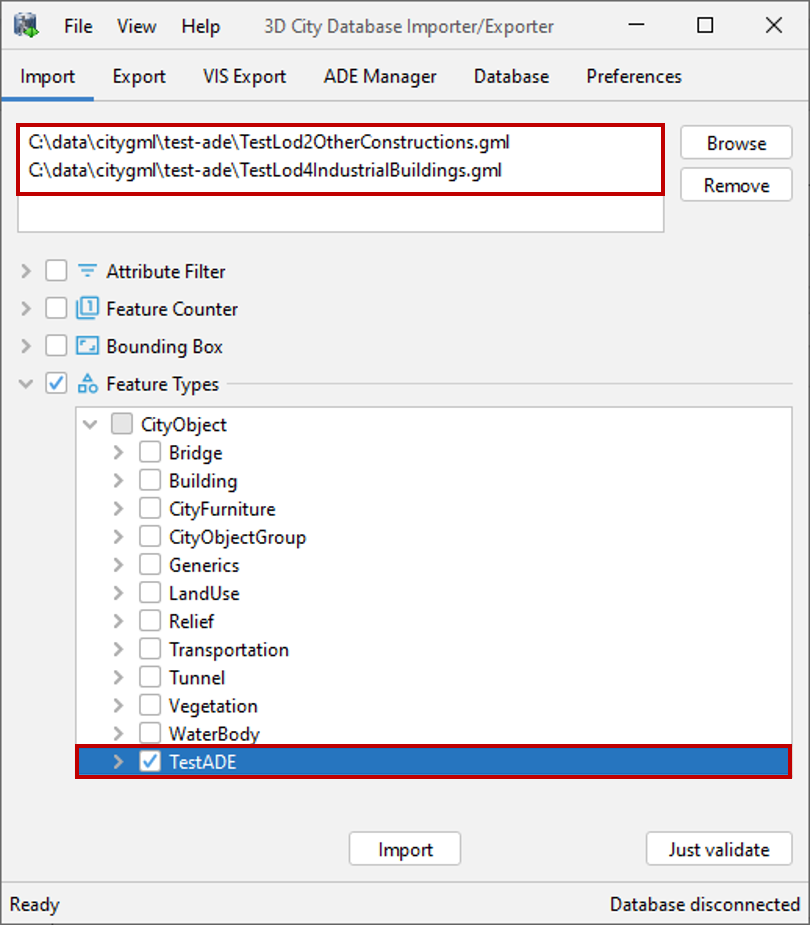
Now test the Importer/Exporter ADE support by importing Test ADE datasets. You can download two free datasets at https://github.com/3dcitydb/extension-test-ade/tree/master/resources/datasets. Go to the Import tab of the Importer/Export to load both datasets into the TestADE test database. You can optionally use the feature type filter like shown below to only import top-level features defined by the Test ADE.
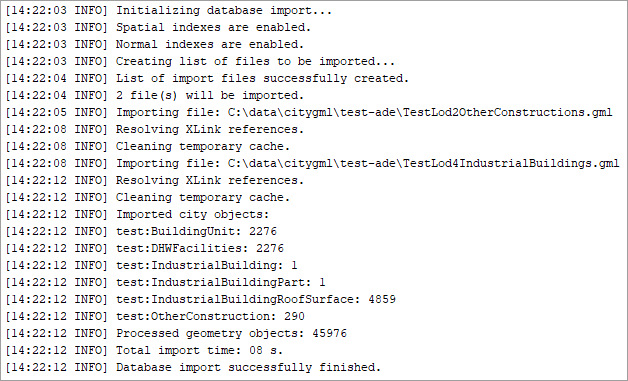
A summary of the import process is printed to the console window. The log messages should look similar to the following figure.
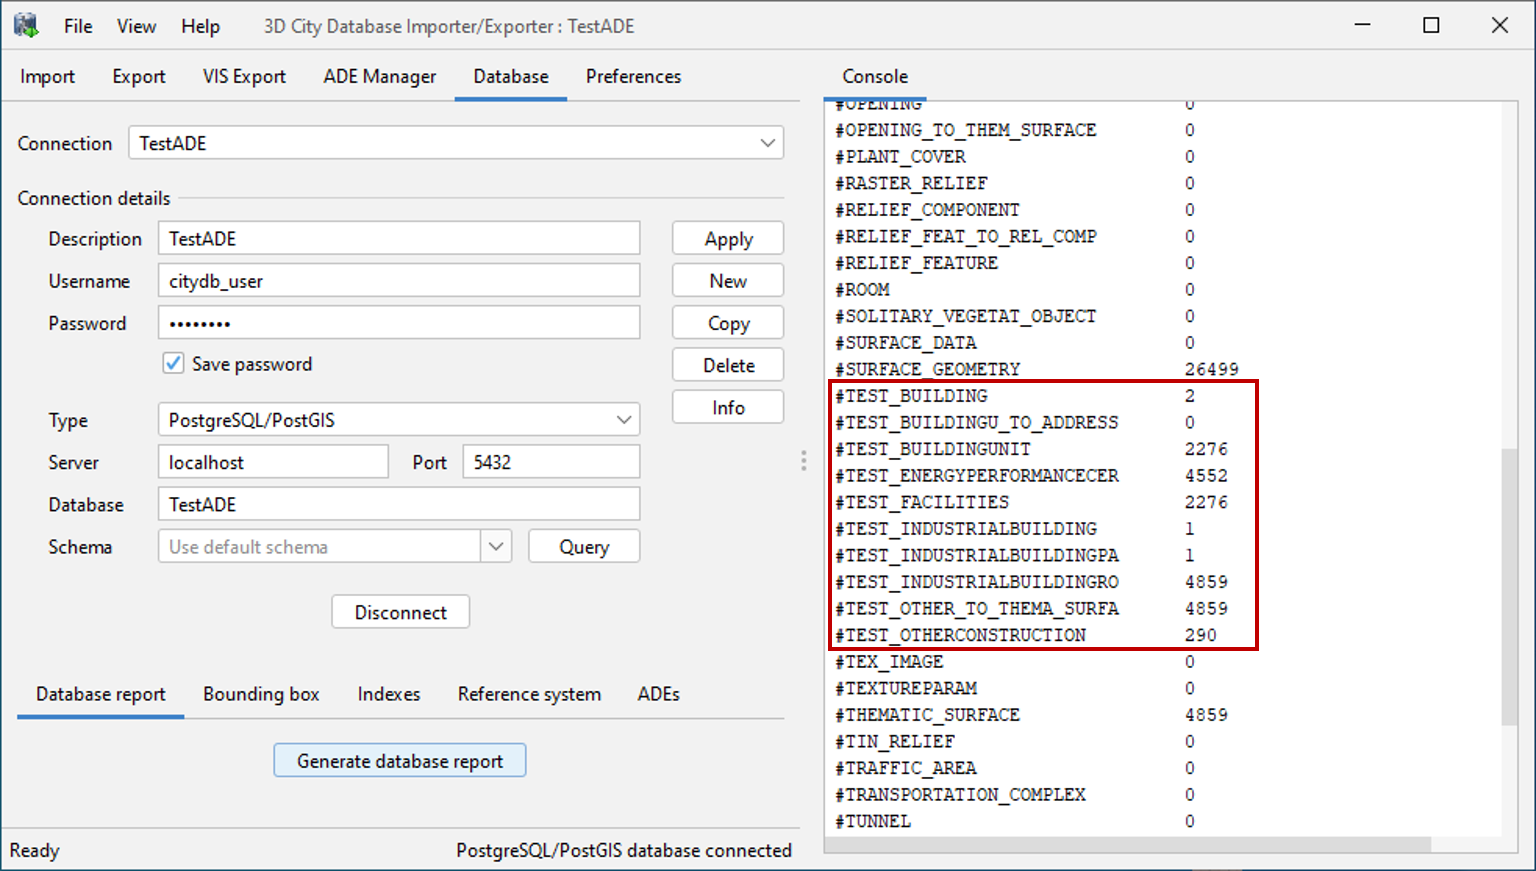
Go back to the Database tab and create a Database report for the TestADE database (see Section 4.3.1). Again, you should get similar numbers for the 3DCityDB abd ADE tables as shown below.
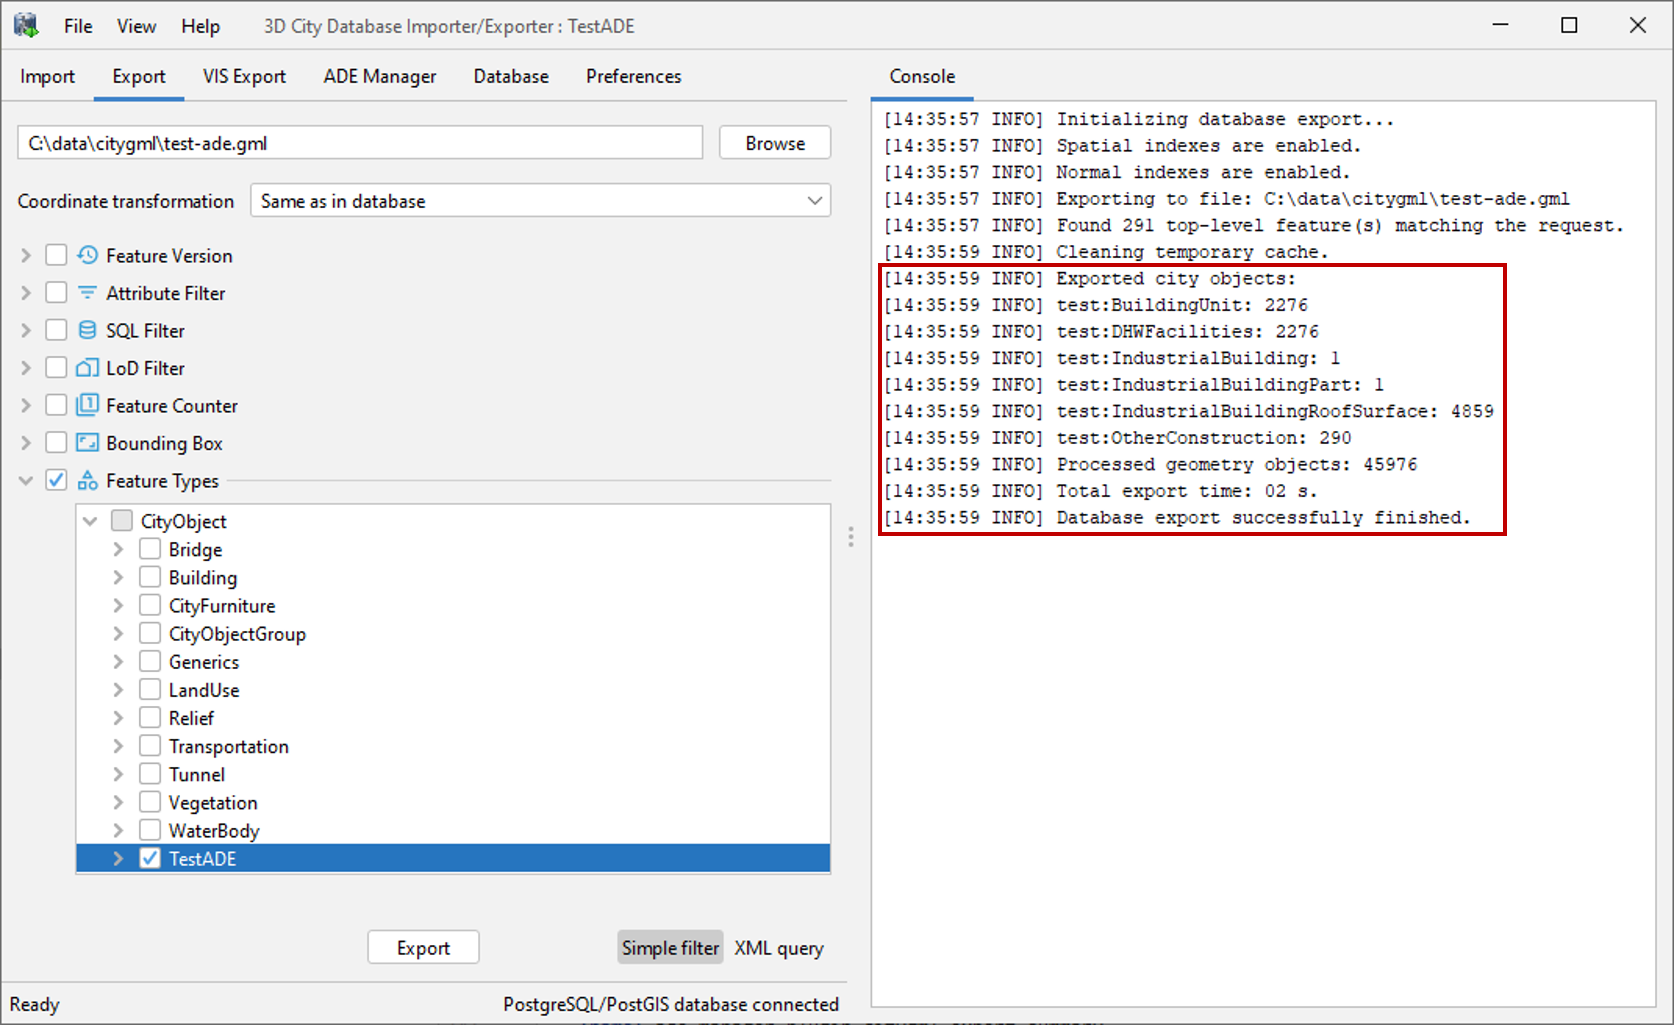
Finally, export your Test ADE data again. For this purpose, go to the Export tab of the Importer/Exporter and specify an output CityGML file. Again, you can use a feature type filter to restrict the export to top-level features defined by the Test ADE. Click the Export button to start the export operation. A summary of the export process is printed to the console window and should look similar to the following figure.